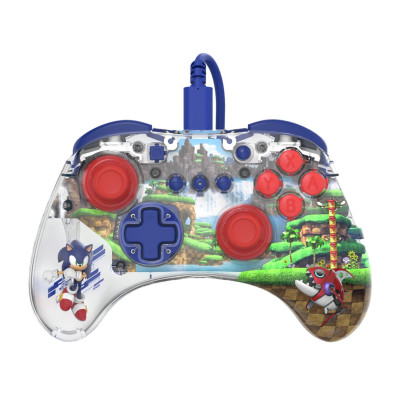
PDP Official Switch REALMz Wired Controller - Sonic Green
320/6557
Product details
- Brand: PDP
- Catalogue number: 320/6557
- Manufacturer's number: 500-221-SON
Argos Technical Support
 UK:
UK:
 Eire:
Eire:
Email me this page
Enter your email address to have this page emailed to you *
Useful links
FAQs
When you connect the controller to your dock, it should be immediately be recognized by your Nintendo Switch and show up in the Controller Configuration Settings. If this is not the case, please check if the controller is getting power.
You can do this by pressing the function button next to the right analog stick. If you press and hold it for 3 seconds, the LED will now light up. If the LED doesn't light up, check if the cable is properly inserted into the controller and your dock.
Also, try connecting the cable to the other USB-port on your Switch-dock.
Sometimes, controllers need to be paired for first use with each console and paired again when you were using it on a different Switch.
Plug the 3.5mm jack of your headset or headphones directly into the 3.5mm port on the controller.
Note: The Nintendo Switch only supports one audio output at a time. When connecting your headset/headphones to the controller, audio via HDMI-connected devices (i.e., TV, amp, etc.) will be disabled. Only the first device will have audio output when connecting more than one USB audio device.
The Nintendo Switch will prompt you to reconnect the controller. Press L and R to connect, and the headset/headphones will play audio.
If you do not hear audio after reconnecting your controller, the volume on your device may be low or at 0%. Hold down the “Home” button on the controller to turn up the volume.
Note: Under the System Settings, an audio setting called “Mute when Headphones are Disconnected” can be enabled. When activated, this option will shut off the system speakers when unplugging or disconnecting a headset until the volume buttons are pressed, or until this setting is manually turned off. To disable this setting manually, select System Settings > System > Mute when Headphones are Disconnected (turn to off).
- The REALMz™ Wired Controller comes with four different lighting effects pre-programmed to the controller’s A, B, X, and Y buttons.
- To explore these effects and cycle through them, hold the “function” button and press either A, B, X, or Y.
Note: When the controller and system turn off, the lighting modes reset to the default mode (the mode for the A button).
To adjust the LED brightness, hold the “function” button and press ZL to decrease brightness, or ZR to increase brightness.
First, lets make sure the Switch Dock is providing power through USB. Connect a USB charging cable such as a phone charger to the Switch Dock, and connect your phone.
If your phone begins to charge and is getting power, proceed to the next step.
If you are not receiving power from the Switch Dock, and your phone or USB-powered device is not getting power, the issue is with your Switch Dock.
If you did receive power in the previous step, press and hold the power button on the Switch until you see Power Options, then select Turn Off. After a few seconds, please turn on the Switch and, using the JoyCons, go into the main screen by pressing A three times.
Afterward, go into System Settings, scroll down until you see Controller and Sensors, and select Change Grip/Order. When prompted, please press L and R on your wireless/wired controller and see if it connects.
If you notice it is still not showing up, please follow the calibration steps below to isolate the issue:
1. Make sure your controller is unplugged from the Switch Dock.
2. Press and hold the down button from the D-Pad
3. Connect the cable to the Switch Dock
4. Let go of the down button from the D-Pad
5. Press A button once
6. Rotate both analog sticks 4 times (Clockwise)
7. Press the down button from the D-Pad
Yes the REALMz wired controller is compatible with PC/Laptop.
Questions & answers
How-to videos
-
How to Fix Controller Stick Drift


Returns policy
If you need advice or support for your product, please in the first instance contact the support provider using the number on this support page.
If you still need to return your product then please visit our most up to date returns policy here.