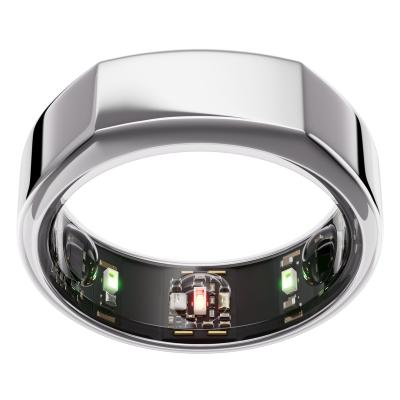
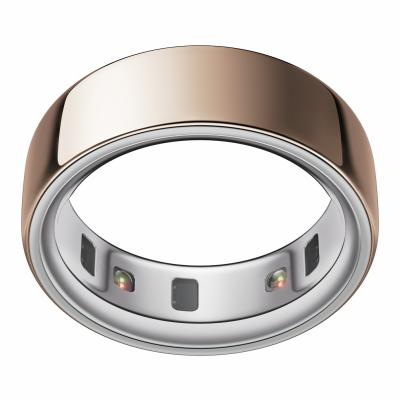
OURA RING 3 HERITAGE SILVER SIZE 8
785/9632
Product details
- Brand: Oura
- Catalogue number: 785/9632
- Manufacturer's number: 10311614
Oura Support
Email me this page
Enter your email address to have this page emailed to you *
Useful links
Online supportFAQs
If you can’t hear sounds on your phone, check the following:
- Check that the volume is turned up.
- Check that silent mode has not been available.
- Inspect the speakers for any visible debris that may be blocking the sound. Remove with a soft brush if necessary.
- Reboot the phone by turning off and on. Alternatively, press and hold the Power and Volume Up button for 15 seconds.
- If the sound issue only occurs on a specific app, check for any app updates.
- Check your phone for any software updates. If available, update the software.
- If your phone has Do Not Disturb mode, try turning this off. This mode silences sounds and notifications.
- If you are using headphones, check that the headphones are secure in the phone. If necessary, try another pair of headphones to determine if the headphones are not producing sound rather than the phone.
- Check if your phone is connected to another Bluetooth device and disconnect if necessary for the sound to come out of the phone direct.
- Perform a Factory Reset. Please note, this will erase all data and settings from your phone.
Click here to read our full article on what to do if you can't hear sounds on your phone.
If you can’t send text messages from your phone, check the following:
- Check that you have sufficient signal by looking at the signal strength.
- Visit your network provider’s website to check if there are any disruptions in your area.
- Check that the Short Message Centre (SMSC) number is correct in your phone. Contact your network provider to get the correct number.
- If using a specific messaging app such as WhatsApp or Facebook Messenger, check for any updates or any software settings.
- Ensure your phone has not run out of storage. If it is full, it will hinder the ability to send messages.
- Check that the Access Point Name (APN) settings are correct. Contact your network provider to get the correct settings.
- Reboot the phone by turning off and on. Alternatively, press and hold the Power and Volume Up button for 15 seconds.
- Try the SIM card in another phone to check if it is an issue with the SIM itself.
If the issue remains, we recommend contacting your network provider for further support.
If you can’t make calls, but you can receive them, check the following:
- Check that you have sufficient signal by looking at the signal strength.
- Visit your network provider’s website to check if there are any disruptions in your area.
- Check that you have not accidentally activated call restrictions such as call-blocking.
- If you have a prepaid SIM, check that you have sufficient balance and top up if necessary.
- If you are in an area where you should be roaming, check that your roaming settings are enabled.
- If you use Voice over LTE (VoLTE) check that this is turned on.
- Check that your network settings are up to date. Contact your network provider for the latest settings.
- Try the SIM card in another phone to check if it is an issue with the SIM itself.
- Reboot the phone by turning off and on. Alternatively, press and hold the Power and Volume Up button for 15 seconds.
If the issue remains, we recommend contacting your network provider for further support.
If your mobile data isn’t working, check the following:
- Check that you have sufficient signal by looking at the signal strength.
- Visit your network provider’s website to check if there are any disruptions in your area.
- Check that mobile data is turned on.
- If you are roaming, ensure that you your roaming settings are correctly configured.
- Check that the Access Point Name (APN) settings are correct on your phone.
- If you have set a data usage limit on your SIM or phone, check to see if this has been reached.
- Try the SIM card in another phone to check if it is an issue with the SIM itself.
- Reboot the phone by turning off and on. Alternatively, press and hold the Power and Volume Up button for 15 seconds.
If the issue remains, we recommend contacting your network provider for further support.
To set up a new Oura Ring, carry out the following steps:
- Download the Oura App from the iOS store or Google Playstore.
- Plug the charger into a USB power source, such as a laptop or supporting power brick.
- Put your ring on the charger. The LED will blink blue to indicate that your ring is ready to be paired.
- Make sure that your device's Bluetooth is enabled.
- Open the Oura App and following the in-app instructions to set up your Oura account.
On Android devices, you might see a prompt asking for access to your contacts and call history while pairing your Oura Ring. This information isn't needed, so you can toggle it off and tap Pair to continue connecting your ring.
If your Oura Ring is not connecting to your device, carry out the following steps:
- Confirm that your device is on the latest version of its operating system (OS) and that you are using the latest version of the Oura App.
- Place your ring on its charger.
- Connect your phone to its own charger to ensure all power saving features are disabled.
- Place your phone next to the ring.
- On your device, turn Bluetooth off and on to try and re-establish the connection.
- Turn off your device's Wi-Fi (Wi-Fi can interfere with Bluetooth in certain cases) and make sure that there are no other radio-powered devices nearby such as laptops, wearables, wireless headphones, etc.
If the above steps do not restore connection:
- Try deleting the Oura App and reinstalling it.
- Restart your phone.
If you are using an Android device running Android 11 or older, you will need to enable location services for Bluetooth connectivity to work:
- Open your device’s "Settings".
- Go to "Apps".
- Select "Oura".
- Select "Permissions".
- "Location" needs to be enabled.
If you are not receiving notifications from the Oura App, carry out the following steps:
- Toggle all five notification settings off and then back on in the Oura App settings.
- Toggle your device's Bluetooth on and off.
- Restart your device.
- Make sure your ring is not in Airplane Mode.
- Ensure that your ring and the Oura App have synced at least once during the day.
Keep in mind: your Oura Ring and device must be within proximity of one another for notifications to work.
Note for iOS users: iOS 18 includes a feature that lets you lock or hide apps. If the Oura App is locked or hidden, you won't receive notifications, and your widgets may also be hidden. For instructions on how to unlock or unhide the Oura App, refer to Apple's guide on locking or hiding apps.
Possible causes of missing sleep data
- Low Battery at Night - If the battery drops too low, the ring enters power-save mode, stopping new data collection.
Tip: Charge to at least 30% before bed.
- Ring Powered Off - If the battery depletes completely, all sleep data is lost, including readiness insights.
Tip: Charge to at least 30% before bed.
- Sleep Too Short - The ring needs at least 3 hours of continuous sleep stage detection over a 24hr period (between 6 PM–6 PM) to identify a main sleep cycle. Shorter periods may not appear, unless followed by another 3+ hour sleep.
- Restless Sleep - Excess movement or disrupted sleep can prevent accurate stage detection, resulting in no data being recorded.
- Not Synced with App -Data may be lost if:
- The ring’s memory fills and overwrites old data
- The ring powers off before syncing
Tip: Sync daily to keep data safe.
- Ring Not Worn - Simply forgetting to wear the ring overnight will result in missing data.
Tip: Double-check it’s on before bed.
To back up your data, carry out the following steps:
- Place your Oura Ring on the charger for a few minutes.
- Open the Oura App and wait for the latest sync. If the sync doesn't happen, you can still proceed with the backup.
- Tap the
 menu in the upper-left corner of the home screen.
 - Tap Settings.
- Under Account, tap Back up all data.
To transfer your Oura Ring and data to a new device, carry out the following steps:
Remove your ring from the old device
- Ensure that you have a stable internet connection.
- Place your ring on the charger until it reaches at least 50%.
- Go to the
 menu in the upper-left corner of the Oura App's home screen.
 - Select Settings.
- Scroll all the way down and select Sign out. Your app data will automatically be backed up during the sign out process.
- When the sign out is complete, go to your device's Bluetooth settings and remove your Oura Ring from the list of connected devices.
Connect your ring to the new device
- Leave your ring on the charger, connected to a power source.
- Install the Oura App on your new phone.
- Follow the in-app instructions to log in to your account and connect your ring.
- Once you have successfully signed in with your current account email address, uninstall the Oura App from your old phone.
To perform a factory reset, carry out the following steps:
- Ensure that you have a stable internet connection.
- Place your ring on the charger for a few minutes.
- Open the Oura App and wait for the latest sync.
- Back up your data:
- Tap on the
 menu in the upper-left corner of the home screen.
 - Select Settings > Back up all data.
- Tap on the
- When the backup is complete, take your ring off the charger and place it on a flat surface.
- Factory reset your ring:
- Tap the
 menu in the upper-left corner > My Oura Ring, or tap the
  battery icon in the upper-right corner to go directly to the My Oura Ring page.
 - Tap Factory reset.
- Tap the
- When the factory reset is complete, leave the ring off the charger and keep it on a flat surface without moving it for two minutes. This allows the ring to enter power saving mode if you're storing the ring.
- In your device's Bluetooth settings, remove your Oura Ring from the list of connected devices.
For accurate sensor readings (heart rate, HRV, temperature, etc.), the ring must maintain consistent skin contact, especially on the underside of the finger. A ring that’s too loose may shift or lose contact; too tight may cause discomfort or restrict blood flow.
The numbers (4, 5, 6, … up to 15) are Oura-specific ring sizes, not standard UK or US ring sizes. You should not assume your “normal ring size” (e.g. UK J, M, Q, etc.). There are no half sizes available.
A ring sizing kit for Gen 4 Rings is available to purchase here to help you purchase the correct ring.
Questions & answers
Returns policy
If you need advice or support for your product, please in the first instance contact the support provider using the number on this support page.
If you still need to return your product then please visit our most up to date returns policy here.