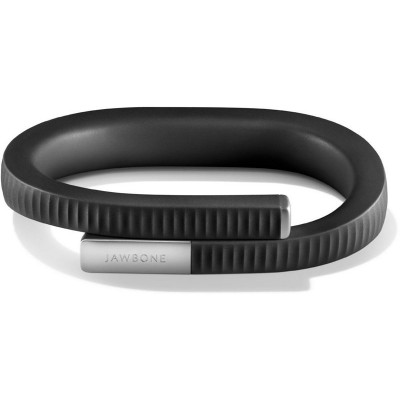
JAWBONE UP24 ACTIVITY TRACKER ONYX LRG
355/7127
Product details
- Brand: Jawbone
- Catalogue number: 355/7127
- Manufacturer's number: TBC
Email me this page
Enter your email address to have this page emailed to you *
Useful links
FAQs
Checklist Reviewing the following points often resolves this type of issue right away:
- Do you frequently use alarms, reminders or alerts? Alarms and alerts use the vibration motor, which causes the battery to drain more quickly and may cause battery life to be slightly shorter than expected.
- Are you and your tracker frequently far away from your phone/tablet? Your tracker uses Bluetooth LE, which requires less energy than standard Bluetooth connectivity. Howe'ver, constantly maximizing the distance between your tracker and the paired device may cause the battery to drain faster than normal.
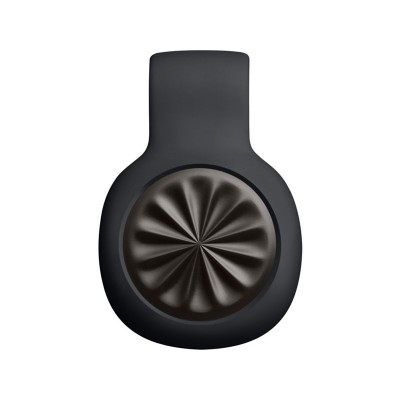
- Review the physical connection and charging method. Charge your tracker using a different USB port, computer or wall outlet to determine if the charging source could be contributing to the issue. Make sure the band's charging ports align flush with the charger, and that the two "snap together" magnetically.
Troubleshooting If the check list didn't resolve the issue, try a soft reset. A soft reset can help resolve a number of issues, including poor battery performance. To perform a soft reset:
- Attach your band to the included USB charging cable, ensuring that the pins on the charger fully align with the charging ports on the band.
- Plug the USB charging cable into a powered USB port.
- Wait until the three lights on your band begin to cycle.
- Remove the charging cable from the USB port, then quickly plug it back in within 5 seconds.
- After plugging it back into the USB port, all three lights flash in unison, slowly at first, then accelerating rapidly, until all three status lights remain on for 1 second. This light behavior takes about 4-5 seconds to complete. The band status lights then return to cycling as they do during charging.
Checklist Reviewing the following points often resolves this type of issue right away: - Is the USB port or wall outlet functioning? Try charging another device using the outlet or USB port, or try charging your band using a different outlet or USB port. If using a USB port, confirm the laptop is fully charges and powered on. - Did the battery drain completely prior to this charging attempt? If the band's battery completely depletes prior to charging again, you may not see any status light response from the band until after a few minute of charging. - Is the band fully attached to the charging cable? Your band and charger connect magnetically. It's important that the four charging prongs on the charger completely align with the charging ports on the band. Try repositioning the band on the charger to confirm a flush connection. If the band appears loose on the charger it is not positioned correctly. - Does the band still sync with the app? If you do not see any light activity during charging but your band still performs properly once removed from the charger, please review our troubleshooting band icons article.
Troubleshooting: If the check list didn't resolve the issue, try a soft reset. A soft reset can help get your band charging again. To perform a soft reset:
- Attach your band to the included USB charging cable, ensuring that the pins on the charger fully align with the charging ports on the band.
- Plug the USB charging cable into a powered USB port.
- Wait until the three lights on your band begin to cycle.
- Remove the charging cable from the USB port, then quickly plug it back in within 5 seconds.
- After plugging it back into the USB port, all three lights flash in unison, slowly at first, then accelerating rapidly, until all three status lights remain on for 1 second. This light behavior takes about 4-5 seconds to complete. The band status lights then return to cycling as they do during charging.
How-to videos
-
Setting Up Your New Band
-
How To Perform a Soft Reset
-
How to Switch Modes
-
How to Wear and Care for Your Band


Returns policy
If you need advice or support for your product, please in the first instance contact the support provider using the number on this support page.
If you still need to return your product then please visit our most up to date returns policy here.