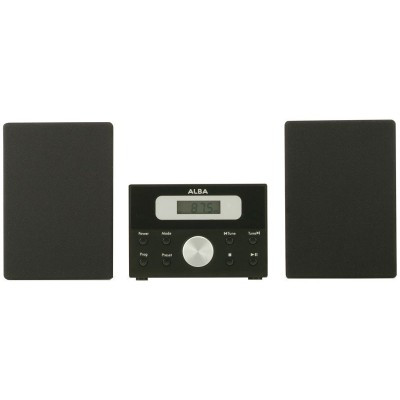
Bush LCD CD Micro System - Black
429/9570
Product details
- Brand: Bush
- Catalogue number: 429/9570
- Manufacturer's number: EPP MICRO
Argos Technical Support
 UK:
UK:
 Eire:
Eire:
Email me this page
Enter your email address to have this page emailed to you *
FAQs
- Fully extend the Wire Aerial for the best reception and sound quality.
- Retune the radio stations on the micro.
- Move the micro to another location to see if the reception improves.
- Check that there is no electrical appliances too close by.
- Check the mains power socket is switched on and that the micro is not in standby mode.
- Check the micro is in the correct mode in regards to the buttons being pressed.
- Unplug the mains power, leave it for 3 minutes then reconnect the power.
- Check that the micro is in CD mode, press and release the Mode Button until ‘CD’ is displayed.
- Check that the CD is not damaged or scratched as they may not work if damaged.
- Check the CD being used is an original audio CD and not a copy.
- Adjust the volume using the Volume Rotatory Control.
- Check the speakers are securely plugged in.
- Check the mains power socket is switched on and that the micro is not in standby mode.
- Check the correct Function Buttons are being used.
- Press and release the Prog Button to move to the pre-set location that will be listened to.
- When pausing between each press, the frequency stored under each location will display.
- Step pressing the Prog Button when on the desired station.
- Press and hold the Fast Forward Button to scan up the frequency band. The micro will search for the next available station and stop on that station.
- Press and release the Fast Forward Button to scan up the frequency band in 0.05MHz steps.
- Press and hold the Fast Backward Button to scan down the frequency band. The micro will search for the next available station and stop on that station.
- Press and release the Fast Backward Button to scan down the frequency band in 0.05MHz steps.
Note: The micro can store up to 20 FM radio stations as a pre-set.
- Press and hold the Prog Button for approximately 2 seconds until ‘P XX’ starts flashing on the display.
- Use the Fast Forward and Fast Backward Buttons to move to the pre-set number it will be stored under.
- Press and release the Prog Button, ‘P XX’ will stop flashing to confirm it has been stored.
Press the Repeat Button for approximately 2 seconds until the display begins to scan.
Release the Repeat Button.
The micro will now scan for and store all of the available FM stations.
Note: If there is already an existing FM station stored under a pre-set it will be overwritten.
- CD-Recordable (CD-R).
- CD-Rewritable (CD-RW).
Note: It is not possible to play DVD’s or computer CD’s.
- Play – Press and release the Play Button on the micro. The first track will begin to play and the ‘PLAY’ icon will display.
- Pause – Press and release the Pause Button. The ‘PLAY’ icon and the elapsed time of the track will flash in pause mode. Press and release the Pause Button again to continue the track.
- Next Track – Press and release the Next Button.
- Previous Track – Press and release the Prev Button.
- Fast Forward Within A Track – Press and hold the Fast Forward Button.
- Fast Backward Within A Track – Press and hold the Fast Backward Button.
- Stop – Press and release the Stop Button.
- Press and release the Lid of the CD player on the front right edge. ‘OP’ will be displayed.
- Place a thumb on the Central Spindle and put fingers under the outside edge of the CD and lift it to remove it.
- Close the Lid of the CD player by pressing down on the Front Right Edge so it clicks shut.
- Note: If the CD is paused for 15 minutes, the micro will go into standby mode.
- Press and release the Lid on the CD Player on the front right edge, where the raised dots indicate the release point. ‘OP’ will be displayed.
- Place an audio CD label side up into the CD Compartment. Ensure that the hole is lined up with the centre of the CD.
- Close the Lid of the CD player, pressing down on the Front Right Edge so it clicks shut.
- The number of CD tracks will be displayed.
Note: If there is no CD in the compartment, ‘n0’ will display.
- Press and release the Mode Button until ‘CD’ is displayed.
- Stop pressing the Mode Button, the micro will now be in CD mode.
- The Micro will begin scanning for CD tracks based on what is inserted, if nothing is inserted the display will show ‘n0’.
- Turn the Rotatory Volume Control clockwise to increase the volume levels.
- Turn the Rotatory Volume Control anti-clockwise to decrease the volume levels.
- The display will confirm the current volume on the device.
- Press and release the Mode Button until ‘AUX’ is displayed.
- Stop pressing the Mode Button as it will now be in AUX In Mode.
- Connect a 3.5mm audio input connect to the AUX Out and the other end to the AUX In on the back of the micro.
- Press the Play Button on the external device to allow playback through the micro speakers.
Note: It is recommended that it is unplugged from the Line in socket after it has been used.
Questions & answers
How-to videos
-
How to register your product
-
How to Stop CDs skipping in a CD Player


Returns policy
If you need advice or support for your product, please in the first instance contact the support provider using the number on this support page.
If you still need to return your product then please visit our most up to date returns policy here.