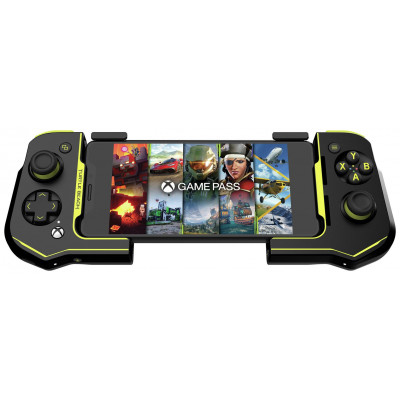
Turtle Beach Atom D4X Mobile Gaming Controller For Android
130/0819
Product details
- Brand: Turtle Beach
- Catalogue number: 130/0819
- Manufacturer's number: TBS-0760-05
Turtle Beach Support
 UK:
UK:
 Eire:
Eire:
Email me this page
Enter your email address to have this page emailed to you *
Useful links
Online supportFAQs
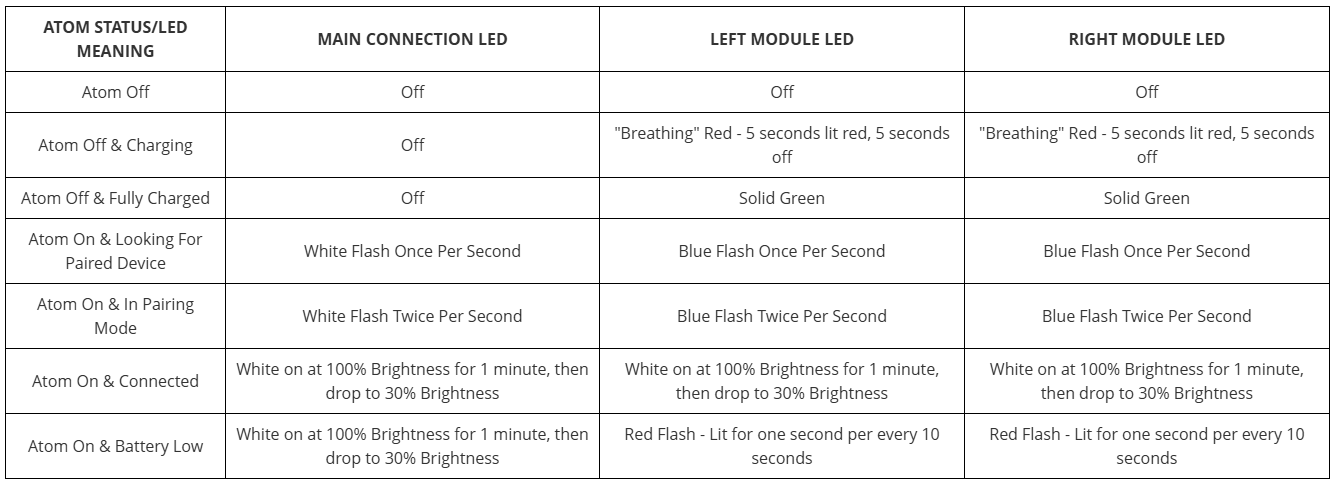
The Atom Controller iOS has three separate LED indications, The first is the Main Connection LED, while the other two are the Left and Right Module LEDs.
The Main Connection LED is located on the Left module, just below the D-Pad, and indicates whether the ATOM Controller iOS is powered on, as well as the pairing status of the controller. The Left Module LED is located on the bottom of the left module, near the Bluetooth pairing button. The Right Module LED is located on the bottom of the right module.
Below is a list of the various LED behaviours and their meaning.
LEFT CONTROLLER

If the controller is powered on, hold down the Home button for two seconds to turn the left controller off.
Hold the L1, L3, and Home button down for 2 seconds. The LED will begin to flash, indicating that the left controller has entered the calibration mode.
Rotate the joystick in its maximum rotation 3 times, and then press the trigger down to its maximum point 3 times.
Press the LB and Down buttons at the same time to save the calibration and exit the calibration mode.
RIGHT CONTROLLER
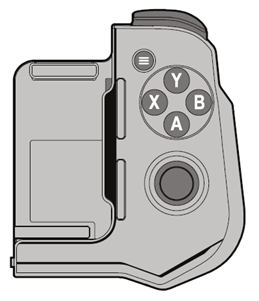
If the controller is powered on, hold down the Menu button for 2 seconds to turn the right controller off.
Hold down the R1, R3, and Menu buttons for 2 seconds. The LED will begin to flash, indicating that the left controller has entered the calibration mode.
Rotate the joystick in its maximum rotation 3 times, and then press the trigger down to its maximum point 3 times.
Press the RB and A buttons at the same time to save the calibration and exist the calibration mode.
To set up your Atom Controller iOS for use with a Bluetooth-enabled iOS smartphone, please do the following.
- Separate the left and right modules.
- Raise the clamps to the required height.
- Securely attach your smartphone to the Atom controller modules. Smartphones with depths between 67-92mm and heights pf 6-10.5mm are supported.
- Press the home button for 2 seconds to power on the left module. Press the menu button for 2 seconds to power on the right module.
- Press and hold the Bluetooth pairing button for 2 seconds. The LED will double-blink (two blinks per second) to indicate the controller is in the pairing mode.
- Enable Bluetooth on your device, and then tap the Atom Controller device entry to pair. When that device entry reads "Connected", your controller is paired to that Bluetooth device.
The Atom Controller iOS comes with a USB-C Cable for you to charge the controller with.
When the battery is low, the LEDS on the right and left modules with flash red once per every 10 seconds. To charge the headset, both modules must be joined in the travel mode (as shown in the image below) for charging. In this mode, the controller will not power on, and thus cannot be used.
Use the supplied USB-C cable to connect the controller -- while in the travel mode -- to a USB port. The LEDs on the right and left modules will begin to "breathe" red (the LEDs will light up red for five seconds, and then go dark for five seconds). When the battery is fully charged, the LEDs on the right and left modules will turn solid green.
When fully charged, the controller will have a 20-hour battery life.
How-to videos
-
How to Fix Controller Stick Drift


Returns policy
If you need advice or support for your product, please in the first instance contact the support provider using the number on this support page.
If you still need to return your product then please visit our most up to date returns policy here.