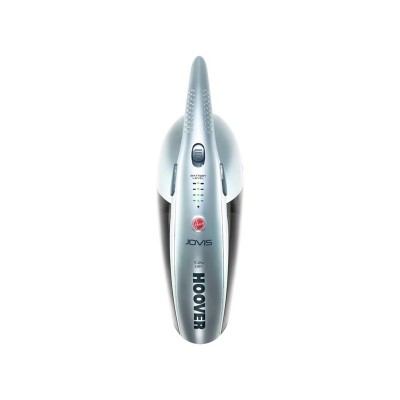
Hoover Jovis SJ72DA4 Handheld Bagless Vacuum Cleaner
424/0457

Product details
- Brand: Hoover
- Catalogue number: 424/0457
- Manufacturer's number: SJ72D4A
Hoover Support (Floorcare Only)
 UK:
UK:
 Eire:
Eire:
Argos Troubleshooter
Resolve problems quickly with this easy-to-use tool.
Email me this page
Enter your email address to have this page emailed to you *
FAQs
Remove cleaner from storage base, press the on/off switch once to turn on and again to turn off. Empty and clean the unit and filter after each use or when the debris or liquid reaches the maximum fill line.
Fit the Squeegee tool in to assist in collecting liquids. When collecting liquids do not fill beyond the maximum fill line.
IMPORTANT: Always keep the cleaner vertical (with the nozzle-end down) during and after collection of liquids, to prevent spillage or liquid entering the motor. Always empty the liquid out of the container immediately after use. Do not pick up solvent based solutions, inflammable or combustible liquids. After picking up liquids the container, deflector and filter MUST be thoroughly dried and the squeegee removed before picking up dry dirt.
IMPORTANT: for best results clean the filter after each use. While holding the cleaner in vertical position, press both dust cup release buttons either side of the handle. The dust cup will be released from the main body of the product. Hold the dust cup over a waste bin and use the filter handle to remove the filter/deflector from the dust cup. Empty the dust container and brush the dust and dirt off the filters. The container, deflector (Wet & Dry only) and filters may be washed in warm soapy water. Make sure all are completely dry before replacing in your cleaner. Replace the filter into the dust container and reassemble the dust container to the cleaner.
Place the cleaner into the base, ensuring the shroud covers the back of the product. Note: Use only the charger supplied with your cleaner to recharge the unit. IMPORTANT: Before first use, charge your cleaner for at least 24 hours. When charging the cleaner, the power switch must be off. It is normal for the charger to become warm to the touch when charging. If the operating time reduces after repeated use, let the cleaner run until it stops, then recharge for 24 hours and repeat this monthly for best results. Never charge the batteries in temperatures above 37°C or below 0°C.
If your vacuum is experiencing a loss of suction, please try the following:
- Check for any debris or blockages in the tubing and main body.
- Ensure the filter has been cleaned and left to dry as per the maintenance and care instructions.
- Check to see if the issue is happening on all attachments. If it is happening with a particular attachment then check there is no damage to this attachment and it is fitted correctly.
If you are still experiencing issues, please get in touch with the support team using the contact details on this page.
If the vacuum isn’t charging, please try the following:
- Try an alternative plug socket.
- Ensure there is no debris stuck in the charging port or at the end of the charging cable.
- Gently wipe the end of the charging cable with a clean, dry cloth.
If you are still experiencing issues, please get in touch with the support team using the contact details on this page.
Questions & answers
How-to videos
-
How to clean the filter
-
How to change your plugs fuse
-
How to solve suction issues on your vacuum
Interactive Help
-
Argos Troubleshooter
Resolve problems quickly with this easy-to-use tool.
Returns policy
If you need advice or support for your product, please in the first instance contact the support provider using the number on this support page.
If you still need to return your product then please visit our most up to date returns policy here.


